Monday, July 29, 2024

Ask The Contractor: Things To Know About Sustainable Building Materials

For good reasons, sustainability is becoming more important and prevalent in the building trades. Planning a home build or remodeling project often brings up terms like sustainable, eco-friendly or environmentally conscious, whether you’re at the store choosing products or talking with your builder or remodeler.

But what is sustainability, and why is it important? We spoke with our resident expert, and Kim Guimond, the Chief Marketing Officer and a sustainable building products authority figure at Modern Mill, an eco-focused building products manufacturer, for some answers.

Q: What does sustainable mean?

A: Relating to building products and practices, sustainability is more than just eco-friendly. Sustainability means that the product or service is, at its core, beneficial to the environment, the economy and society, while not jeopardizing future generations’ well-being.

For example, a solar energy company’s primary purpose is to generate electricity in a way that protects the environment. The best solar energy companies go several steps further by also considering the economic and social impacts of their business, products and practices while looking for ways to minimize any long-term adverse effects.

Q: What are sustainable building materials?

A: Although many building materials are correctly labeled as green or environmentally friendly, sustainable building materials are ecologically friendly both now and in the future. The most sustainable building products are ones that actually leave the environment and society better in the long run.

Q: What are sustainable building materials made of?

A: Sustainable building materials are typically made from natural materials that are easily replaceable and, most often, recyclable. Their production and use have little or no adverse effects on the environment or future economies.

Q: Are sustainable products the same as recycled materials?

A: Sustainable products are typically recyclable and are often created from recycled materials. However, reusing recycled materials, while not allowing them to end up in a landfill, sometimes has a large carbon footprint, which can limit the positive environmental benefits.

Whether or not they’re made from recycled materials, sustainable products consider the entire environmental, economic and social impact from conception to finished product, and even factor in what happens after the product’s useful life is exhausted.

Q: What are the pros and cons of using sustainable building materials?

A: Like any new building materials and concepts, there are pros and cons to consider when deciding where your project may fit into the sustainability equation.

Pros

  • Products are environmentally and socially beneficial.
  • Some sustainable products can lower the overall price of a project and minimize ongoing costs.
  • Sustainable business practices, in general, improve local and regional economies.

Cons

  • Agreement about what constitutes as a sustainable material is still being determined.
  • Many sustainable products are still cost-prohibitive for large-scale use.
  • Slow adoption and regional resources can limit economic improvements.

Q: Are sustainable building materials worth it?

A: Cost is always a factor when deciding whether or no something is worth it. Although some sustainable materials are already inexpensive enough to compete with less eco-friendly products, many are only available at premium prices. However, overall cost reductions from energy savings and long lifespans often offset the higher initial price.

When deciding if adding sustainable materials to your next project is worth it, balance the initial price against environmental and long-term costs. Source

Friday, July 26, 2024

Understanding When You Need to Use Lateral Bracing on Your Interior Wall

Interior walls, the unsung heroes of architectural design, provide structural support and partition spaces within buildings. While often overlooked, the importance of ensuring their stability cannot be overstated. One critical aspect of interior wall stability is the incorporation of lateral bracing. But when exactly do you need to use lateral bracing on your interior wall?

Lateral bracing serves a vital function in preventing the horizontal movement or sway of your interior walls, particularly in structures with multiple stories. This is crucial for maintaining the integrity and safety of your building, especially during seismic events or high winds. Without proper lateral bracing, your walls can bow, buckle, or even collapse under the stress of lateral forces.

So, when should you consider incorporating lateral bracing into your interior wall design?

1.) Tall Walls: If you have interior walls that extend over multiple stories, they are more susceptible to lateral movement. As the height of your wall increases, so does the potential for lateral instability. Lateral bracing becomes essential in these instances to counteract the forces exerted on your wall.

2.) Open Floor Plans: Modern architectural trends often favor open floor plans, where large, uninterrupted spaces are created by minimizing the number of interior walls. While aesthetically pleasing, these designs can compromise your structural stability by reducing the amount of bracing available. In such cases, strategic placement of lateral bracing is necessary to compensate for the absence of partitioning walls.

3.) Structural Loads: Your interior walls must support not only their own weight but also the loads imposed by floors, ceilings, and other structural elements. The distribution of these loads can exert significant lateral forces on your walls, especially in buildings with irregular or asymmetrical layouts. Lateral bracing helps redistribute these forces and prevent disproportionate stress on individual walls.

4.) Building Codes and Regulations: Building codes and regulations set forth by local authorities often dictate the requirements for lateral bracing in interior walls. These standards are established to ensure the structural integrity and safety of buildings under various conditions, including seismic activity and high winds. Compliance with these codes is non-negotiable and serves as a fundamental aspect of your responsible architectural and engineering practices.

5.) Engineer's Assessment: In some cases, the need for lateral bracing may not be explicitly outlined by building codes but is determined through structural analysis and engineering judgment. Experienced engineers assess factors such as wall height, building materials, site location, and anticipated loads to determine the appropriate bracing requirements for your interior walls. Source

Tuesday, July 23, 2024

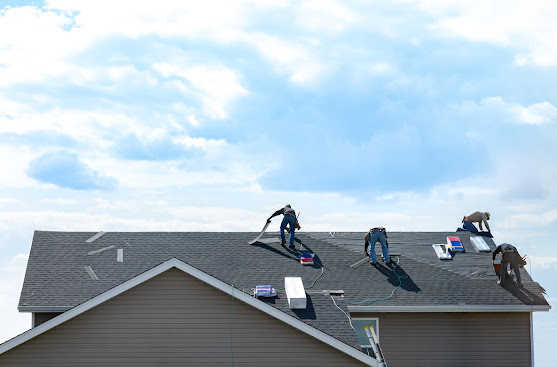
9 Signs You Need A New Roof

Roofs are constantly exposed to brutal elements. Baking sun, ripping winds, freezing temperatures and pounding rain all take their toll on this important protective layer. While some types of roofs can potentially last 25 years, shingles do eventually age, bend, break, tear or simply fall apart. It can be hard to tell how bad things are from the ground, but these nine signs you need a new roof will help.

1. The Roof Is About to Turn 25

Homeowners should check their receipts and improvement records for the date their roof was last replaced. Typical asphalt shingle systems have lifespans of 20 to 25 years. If that time window has passed, most homeowners can start planning for a new roof.

Note: If the shingles were installed on top of an existing layer of shingles, then they might not last as long. Twenty years is typical for these kinds of applications.

2. Your Neighbors Are Having Theirs Done

For homeowners in developments and subdivisions, the sound of roofing nailers in the neighborhood might be a sign. Most developments grow a few houses at a time, meaning that many of the homes in the neighborhood are relatively close in age. And since these houses often use the same materials purchased by the builder at a bulk rate, the roofs should deteriorate at a similar rate. So, if everyone’s replacing their roof, maybe you should too.

3. Missing Shingles

Missing shingles are never a good sign. This occurs when the shingle itself weakens, and the adhesive holding the bottom in place starts separating from the course below. At that point, all it takes is the right gust of wind for a shingle to fall off.

However, just one or two missing shingles isn’t the end of the world. In some cases, the cause could be improper installation. A relatively quick repair could have the roof back in top shape, though the shingle color might not be an exact match.

4. Shingles Are Starting to Cup, Curl or Claw

Some telltale signs that a roof is nearing the end of its lifespan are cupping, curling or clawing. Cupping and curling look very similar, with the ends of the shingles peeling away from the courses below them and beginning to point upward. Clawing occurs when the center of the shingle lifts while the ends stay in contact with the roof. Neither condition is a good sign, and they can be the result of extreme temperatures, improper installation, poor ventilation or age.

5. Grit in the Gutter

Asphalt shingles have grit or granules embedded in their surface, and these granules create a barrier between the sun and the shingle. It’s normal for a bit of grit to loosen up and fall off (especially when the roof is new). But if more and more granules are collecting in the gutters every fall, there might be a problem. Without the grit, the sun will bake the shingles and cause them to warp, cup or deteriorate.

6. Cracking Shingles

From the ground, it may be possible to see what appear to be cracks sprawling across two or three shingles. Those aren’t cracks, though. They’re actually tears that come from prolonged thermal expansion and contraction cycles. As the sun rises and heats the roof, the shingles expand. As the temperatures drop, they contract. Over time, these tiles tear and become the prime location for leaks and structural damage.

7. Shingle Pieces in the Yard

Shingles don’t always fall off in full strips. For deteriorating roofs, it can be just as typical to see small chunks of shingles in the yard, and it’s not always easy to see where they’re coming from. Homeowners that notice small pieces of shingles in their yards after a few different windstorms should consider getting a closer look at their roof or calling in a pro to inspect it.

8. Sagging Roof

A sagging roof is one of the most telltale signs that you need a new installation. Sagging happens when there is a structural issue below the shingles, such as severe water damage or a broken rafter. In either case, a contractor will need to remove the shingles and plywood sheathing underneath to get to the bottom of the problem.

9. Water Damage

Apparent water damage inside the home is a fairly straightforward sign that the roof is no longer doing its job. This damage could be the result of ice dams, compromised shingles, deteriorated flashing or poor installation techniques. Whatever the case may be, leaks don’t get better on their own, and homeowners should look into replacing or repairing their roof in short order. A leaky roof can lead to mold and attract pests like carpenter ants. Source

Saturday, July 20, 2024

Kenneth F. Burns Memorial Bridge Construction Time-Lapse

 
Watch progress for the Kenneth F. Burns Memorial Bridge Replacement Project with EarthCam's time-lapse movie. See construction for the new 870-foot-long bridge in Massachusetts from August 2012 to November 2015 with stunning HD imagery.


Wednesday, July 17, 2024

Building a New Home, Have You Considered Radon?

There are so many things to consider when having a new home built - so many choices to make. How many bedrooms should you have? Is the kitchen large enough? Do you need a basement?

You may even be concerned about environmental issues, such as the fumes from new building materials and furnishings. But are you concerned about radon? You should be.

What You Should Know about Radon

Radon is a radioactive gas that comes from the soil. Exposure to radon gas it the second-leading cause of lung cancer (after smoking) in the United States. About 21,000 people die each year from radon-related lung cancer.

Radon is produced from the natural breakdown of the uranium found in most rocks and soils. As it further breaks down, radon emits atomic particles. These particles are in the air we breathe. Once inhaled, they can be deposited in our lungs. The energy associated with these particles can alter cell DNA, thus increasing the risk of lung cancer.

Radon usually does not present a health risk outdoors because it is diluted in the open air. Radon can, however, build up to dangerous levels inside a house.

Radon Entry

Radon can enter your new house through cracks or openings in the foundation. The differences in air pressure between the inside of a building and the soil around it also play an important role in radon entry. If the air pressure of a house is greater than the soil beneath it, radon will remain outside. However, if the air pressure of a house is lower than the surrounding soil (which is usually the case), the house will act as a vacuum, sucking radon gas inside.

Because radon comes from the soil, the geology of an area can help to predict the potential for elevated indoor radon levels. The U.S. Environmental Protection Agency (EPA) has worked with state and federal geologists to develop maps which predict the potential indoor radon levels for every county in the United States. Those counties with the highest potential are designated as Zone 1; those with the lowest comprise Zone 3.

Zone 1 areas have predicted average radon levels at or above the EPA's 4.0 pico-Curies per liter (pCi/L) action level. (pCi/L is a measure of the amount of radioactivity in a known quantity of air.) If you are building in a Zone 1 county, you should include a radon control system in your new home. It is an inexpensive addition to the total cost of your house and is an easy way to protect you and your family.

Talk to Your Builder

You and your builder can design your new house to be radon resistant. For a small fee your builder can take the following four simple steps to deter radon from entering your home.

  • Install a layer of clean gravel or aggregate beneath the slab or flooring system.
  • Lay polyethylene sheeting on top of the gravel layer.
  • Include a gas-tight venting pipe from the gravel level through the building to the roof.
  • Seal and caulk the foundation thoroughly.

These construction techniques will be familiar to your builder. There is no need to hire a special contractor or architect. Many builders already incorporate some of these steps in the construction of their houses to control moisture or increase energy efficiency. In fact, radon-resistant construction techniques can be found in the 1995 version of the One-and-Two Family Dwelling Code published by the Council of American Building Officials.

Understanding a Radon System

Radon-resistant construction techniques comprise a "passive" radon system. This system overcomes the vacuum effect experienced by most houses by creating a pressure barrier to radon entry. The system also includes a pipe to vent radon gas safely to the outdoors.

Sometimes a passive radon system isn't enough to prevent radon from entering a house. In this case, a fan can be installed to pull the radon gas from the underlying soil into the vent pipe where it can be exhausted outside the house. The addition of a fan and its associated wiring creates and "active" radon system.

Testing: The Final Word

The only way to know if your new home has a radon problem is to test. The EPA recommends that average annual indoor radon levels do not exceed 4.0 pCi/L. If your home is built with a passive radon system, you should test it immediately after moving in to make sure that radon levels are below the EPA guideline. Remember: If your radon level is 4.0 pCi/L or above, a fan can be installed easily to lower radon levels well below this guideline.

Even if you must install a fan, adding a radon control system to a house under construction is much less expensive than installing one after the house is built. The average cost for a radon control system in an existing house is comparable to other home repairs. Adding radon-resistant construction now will save you unnecessary expense and worry later. Source

Sunday, July 14, 2024

How Much Does A Home Inspection Cost?

Getting a professional home inspection is an extremely important part in the home buying process. Although it’s yet another expense in an expensive process, homebuyers should never skip them. Inspections can reveal problems with the property that the buyers may not have noticed or that the current homeowner isn’t even aware of, which may ultimately impact the final selling price of the home. 

The average cost of a home inspection is $340, with costs ranging from $200 to $500.

What Is a Home Inspection?

A home inspection is a thorough examination of the condition of a home. With a systematic approach, a professional home inspector will evaluate the physical condition of a residential property to determine its overall safety, functionality and structural integrity.

Professional home inspectors check HVAC, electrical and plumbing components as well as windows, doors and insulation. Once they have examined a home to look for potential issues, the professional will provide a detailed report on the property’s condition. In a home buying scenario, they will hand this report over to the buyer to ensure they know the status of the house before its sale.

If you’re buying a home, an inspection is the best way to protect your real estate investment.

Home Inspection Cost Per Square Foot

Home size is a significant factor that determines home inspection costs. Professional inspectors often charge based on the square footage of the home because it largely determines the scope of the work and the length of time they will spend on the inspection.

Home inspections cost as little as $200 for an area of less than 1,000 square feet (a tiny home or condo, for example). Costs increase as home size increases, with an inspection of an average 1,500-square-foot single family home costing between $300 and $400 and a larger multi-family home inspection costing upwards of $500.

New Construction Home Inspection Cost

It may seem counterintuitive, but you should purchase a home inspection even if the home you’re looking to buy is brand new. It’s important to know the home is structurally sound before you buy. And if you find an issue, which is very common in a new construction home, the home builders have resources necessary to make requested repairs and are more likely to complete them than a homeowner.

A pre-drywall inspection that covers a walkthrough before the builders install drywall will cost between $100 and $300. A home inspection after the home is completed costs $400 on average.

What is Included in the Cost of a Home Inspection?

Each home inspector focuses on different things, so do your research ahead of time to find out what they cover. To cover your bases, find an inspector who will examine several components, including:

  • Yard
  • Exterior structures
  • Plumbing
  • Appliances
  • Roof
  • Attic
  • Foundation
  • Electrical system
  • HVAC system
  • Windows
  • Doors
  • Walls

Your inspector will provide you with a report detailing any issues they found during the inspection along with photos. You may choose to repair these after you purchase the home or negotiate for the seller to complete them before the sale. Source


Thursday, July 11, 2024

Do Home Warranties Cover Roofs? Tips To Maintain Your Roof

Roof repairs are expensive and inevitable, so being financially protected when repairs are required is of utmost importance. To that end, your homeowner’s insurance policy and roof warranty help to shield you from the otherwise egregious upfront cost of repairs.

Homeowners insurance will cover the cost of repairing damage from accidental and catastrophic events (like storms and fallen branches) and a new roof warranty will cover damage resulting from improper installation or manufacturer defects. However, neither will cover repairs caused by wear and tear, like roof leaks. That’s where a home warranty comes in.

Do Home Warranty Companies Cover Roof Leaks?

Home warranty policies help to cover the cost of replacing or repairing major systems and appliances in your home. That includes the plumbing, electrical and HVAC systems, as well as appliances like your water heater and washing machine. Home warranties may also cover items like your swimming pool and roof.

While some home warranties offer roof coverage as part of their standard package, it’s usually an add-on option that you need to choose when signing up for the policy.

Home warranty roof coverage is primarily concerned with repairing roof leaks, and not much else. The secondary damage (like mold and other interior damage) caused by the leak falls under your homeowners insurance policy instead.

Home Warranty Roof Coverage Specifics

Home warranty roof coverage is meant to fill in the gaps not covered by homeowners insurance to create a comprehensive package. While homeowners insurance will cover the damage caused by the leak, it won’t cover the cost to repair the leak itself. On the other hand, home warranty roof coverage will cover the cost to repair the roof leak, but not the secondary damage that results.

Most home warranty companies only cover the most common types of roofs (like asphalt or wood shingles and clay tiles) and only roofs over occupied sections of your home (like the living and bedrooms).

Along with certain roof types and sections of your homes, various exclusions may apply to the types of leaks a home warranty company may repair.

The specific coverage and exclusions will vary between home warranty companies, so carefully read the contract of each home warranty company you’re considering to learn exactly what’s covered under their policy.

5 Tips to Maintain Your Roof

Considering that home warranty roof coverage has a limit for the total cost of the repair it will cover and you need to pay a service fee for each repair, it’s important to take the following maintenance steps to prevent roof leaks from occurring in the first place:

1.) Clean leaves and debris off the roof once a year.

2.) Visually inspect the roof for damaged and missing shingles or panels at least once a year, and after every large wind storm or significant weather event.

3.) Remove moss, algae and mold as soon as they’re discovered.

4.) One to two times a year, inspect the sealant and caulking around skylights and roof vents. Replace any damaged or missing sections.

5.) Clean your gutters at least once a year to prevent clogs that can cause water to overflow onto your roof and cause leaks or damage.

Using a ladder and working from your roof can be dangerous, so it’s strongly advised to have a qualified professional perform the necessary maintenance items. This is especially true if your roof is steep, you have a multi-story home, or you don’t have the necessary equipment or experience to safely perform the steps yourself. Source


Sunday, July 7, 2024

Fire Resistance Rating: Protecting from Fire Damage

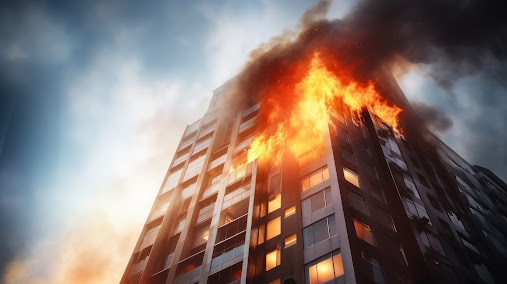
Fire is a devastating force that can cause immense destruction to buildings and endanger lives. To mitigate the risks associated with fire, it is crucial to implement fire safety measures, including the use of fire-resistant materials and adherence to fire codes and regulations. One of the key aspects of fire safety is understanding the concept of fire resistance rating. Fire resistance rating refers to the duration that a building component, such as a wall, floor, or door, can withstand the effects of fire without compromising its structural integrity or spreading the fire to other areas. The rating is determined through rigorous testing procedures conducted in specialized laboratories.

Importance of Fire Resistance Rating

The primary purpose of fire resistance is to provide occupants with sufficient time to evacuate a building safely during a fire incident. By implementing fire-resistant materials and assemblies, the spread of fire and smoke can be delayed, allowing emergency response teams more time to control the situation.

Moreover, fire resistance rating plays a critical role in protecting property and minimizing damage, reducing the potential financial losses associated with fire accidents.

Factors Affecting Fire Resistance Rating

Several factors influence the fire resistance of a building component. These include the type and thickness of materials used, the structural configuration,  insulation properties, and the presence of fire protection systems like sprinklers. Each of these factors plays a significant role in determining the overall fire performance of the structure.

Fire resistance rating is a measure of how well a material, structure, or assembly can withstand exposure to fire. Several factors can affect the fire rating of a particular element or system. Here are some of the key factors:

  • Material Composition: The type and composition of materials used in construction play a significant role in determining fire resistance. Certain materials, such as  concrete, gypsum, and mineral wool, are inherently more fire-resistant compared to wood or plastics.
  • Thickness: The thickness of a material or assembly can impact its fire resistance rating. Thicker materials generally provide better  insulation and are more effective at preventing the transfer of heat during a fire.
  • Density: The density of a material affects its ability to absorb and retain heat. Materials with higher density, such as  concrete or brick, tend to have better fire resistance properties due to their ability to absorb and dissipate heat.
  • Fire-Resistant Coatings: Applying fire-resistant coatings or treatments to materials can enhance their fire resistance rating. These coatings are designed to form a protective barrier that delays the spread of fire and reduces heat transfer.
  • Structural Configuration: The design and configuration of a structure or assembly can influence its fire resistance. For example, the presence of fire-resistant barriers, firestops, and compartmentalization can help prevent the spread of fire and limit its impact.
  • Ventilation: The presence and design of ventilation systems can impact the fire resistance rating of a building. Properly designed ventilation can help remove smoke and heat, improving occupant safety and minimizing damage.
  • Fire-Resistant Joints and Seals: Joints and seals in building assemblies can be vulnerable to fire spread. The use of fire-resistant seals, gaskets, and expansion joints can help maintain the integrity of fire-rated assemblies and prevent fire penetration.
  • Installation Quality: The quality of construction and installation practices can affect the fire resistance of a structure. Proper installation of fire-rated materials, adherence to building codes, and regular maintenance can ensure that the intended fire resistance rating is achieved.

Factors Affecting Fire Resistance Rating of buildings

Several factors can affect the fire resistance of buildings. These factors influence the ability of the building’s structural elements and systems to withstand the effects of fire. Here are some key factors:
  •  Building Materials: The type of materials used in construction significantly impacts the fire resistance. Certain materials, such as  concrete, brick, and steel, have inherent fire-resistant properties and provide better protection against fire compared to wood or plastics. The composition and thickness of these materials play a crucial role in determining their fire resistance.
  • Structural Design: The structural design of the building influences its fire resistance rating. Elements like fire-rated walls, floors, and doors, along with the arrangement of compartments and firebreaks, can help contain the spread of fire and limit its impact. A well-designed building with proper fire-resistant barriers and compartmentalization can enhance its overall fire resistance.
  • Fire Protection Systems: The presence and effectiveness of fire protection systems greatly impact the fire resistance rating. These systems include  fire sprinklers, fire alarms, smoke detectors, and fire extinguishers. Adequate installation, maintenance, and functionality of these systems can help detect and suppress fires, minimizing their spread and damage.
  • Fire Resistance of Building Components: Different components within a building, such as walls, floors, columns, and roofs, have varying fire resistance ratings. The fire resistance of these components depends on factors such as their materials, thickness,  insulation, and the presence of fireproofing measures. Each component’s fire resistance contributes to the overall fire resistance of the building.
  • Ventilation Systems: The design and operation of ventilation systems can impact the fire resistance rating. Properly designed ventilation can help remove smoke and heat, improving occupant safety and minimizing fire spread. However, improper ventilation can accelerate the spread of fire and smoke throughout the building.
  • Occupant Load: The number of occupants in a building affects its fire resistance. Buildings designed for high occupant loads may require stricter fire safety measures to ensure the safe evacuation of occupants in the event of a fire.
  • Maintenance and Upkeep: Regular maintenance and inspection of fire protection systems, building components, and fire-rated materials are essential to maintain the intended fire resistance rating. Neglecting maintenance can compromise the effectiveness of fire-resistant elements and reduce the building’s overall fire resistance.
  • Compliance with Building Codes: Adherence to local building codes and regulations is crucial in determining the fire resistance rating. Building codes provide guidelines and requirements for fire safety measures, including fire-resistant construction materials, fire-rated assemblies, and installation practices. Compliance with these codes ensures that the building meets minimum fire safety standards.
It’s important to note that the fire resistance of a building is typically determined through standardized testing procedures and certifications. These ratings provide a standardized way to evaluate and compare the fire resistance of different buildings.

Fire resistance rating plays a crucial role in safeguarding structures and occupants from the devastating effects of fire. By understanding the concept, adhering to building codes, and utilizing fire-resistant materials and assemblies, we can significantly reduce the risk of fire-related incidents. Source

Friday, July 5, 2024

Happy Independence Day

May this Independence Day bring you happiness, joy and prosperity. Hope you had a very Happy Independence Day!!

Tuesday, July 2, 2024

Density of Sand: A Comprehensive Guide

Sand is a ubiquitous material that we encounter in various forms throughout our lives. Whether it’s building sandcastles on the beach or observing  sand dunes in the desert, this granular substance holds a fascinating world of science within its tiny grains. Sand is an integral part of our natural environment, comprising tiny mineral or organic particles that have settled over millennia. Its density varies widely based on numerous factors, making it a compelling subject of study. Density is defined as the mass of an object divided by its volume. In the case of  sand, it refers to how tightly packed the sand grains are within a given space.

To determine the density, we need to know both its mass and volume. This involves carefully measuring and weighing a known quantity of  sand.

Sand isn’t a single uniform substance. It can be composed of various minerals such as quartz, feldspar, or even shell fragments, each influencing its density.

The density of sand varies because of its different compositions and the way it’s deposited over time.

Factors Influencing Sand Density

  • Grain Size

The size of sand grains plays a crucial role in determining its density. Finer grains tend to pack more tightly than coarser ones.

  • Moisture Content

The presence of moisture can affect its density significantly. Wet  sand is denser than dry sand due to the added weight of water.

  • Compaction

The degree of compaction, or how tightly packed it is, also impacts its density. Loose  sand has a low denser than densely packed sand.

Density Variations in Different Types of Sand

  • Beach  Sand

Beach sand / sea sand typically has a moderate density and is well-known for its use in constructing sandcastles.

The typical density of the beach sand is around 1500-1600 kg/m³

  • Desert  Sand

Desert sand, on the other hand, often has a lower density due to its larger, wind-weathered grains.

The typical density of the desert sand is in the range of 1450-1650 kg/m³

  • Construction Sand; River Sand

Construction  sand / river sand needs to meet specific density requirements to ensure stability in building projects.

The river sand density is vary in the range of 1600-1800 kg/m³

  • Manufactured Sand

Manufactured sand is called as Msand in the construction. Manufactured  sand is used as a replacement to the river sand.

The density of the manufactured sand is around 1750 kg/m³ Source